How To Install Roofing Shingles
Install roofing shingles like a pro! Your home’s roof protects you from harsh weather conditions, adds value, and curbs appeal to your home. However, if you’re unfamiliar with roofing shingles, the installation process can be overwhelming and intimidating.
This guide will help you, from preparation to cleanup. Whether you’re a DIY enthusiast or a professional contractor, this tutorial will provide valuable tips, tricks, and best practices to ensure that your roofing shingles are installed correctly and last for years. So, get your tools, and let’s get started!
Types of roofing shingles

Before we start with the installation process, it’s crucial to understand the different types of roofing shingles available in the market. Various types of roofing shingles are available, and each has its own advantages and disadvantages. Here are some common types of roofing shingles:
Asphalt shingles: These are some popular types of roofing shingles, and they are made of fiberglass coated with asphalt. They are more durable, affordable, and easy to install.
Wood shingles: These shingles are made of cedar, redwood, or pine, and they give a natural look to your roof. They are eco-friendly and long-lasting, but they require regular maintenance.
Metal shingles: These are made of aluminum or steel and are available in various colors and styles. They are durable, fire-resistant, and energy-efficient.
Slate shingles: These are made of natural stone and are the most expensive roofing shingles. They are long-lasting, fire-resistant, and eco-friendly.
When selecting the type of shingles for your roof, consider factors like your budget, the climate in your area, and the overall aesthetic of your property.
Tools and materials needed
Now that you’ve decided on the type of shingles for your roof, it’s time to gather the necessary tools and materials. Here’s a list of the materials and tools you’ll need:
- Roofing nails
- Hammer
- Roofing tar
- Utility knife
- Measuring tape
- Chalk line
- Roofing underlayment
- Starter shingles
- Shingles
- Ridge cap shingles
- Make sure you have the correct tools and materials before starting the installation process.
Preparing the roof for shingle installation

Before you can install the shingles, you need to prepare the roof. This involves removing the old shingles, checking for damage to the roof deck, and repairing any damage. Here’s how to prepare the roof for shingle installation:
1. Remove the old shingles: Use a flat shovel or a roofing scraper to remove the old shingles from the roof. Be careful not to damage the roof deck.
2. Inspect the roof deck: Check the roof deck for any damage, such as rotting or warping. Replace any damaged sections.
3. Install drip edge: Install a drip edge along the rakes and eaves of your roof to prevent water from seeping underneath the shingles.
4. Install ice and water shield: Install an ice and water shield along the valleys and eaves of the roof to prevent water damage.
5. Install the underlayment: Install the roofing underlayment over the entire roof deck. The underlayment helps to prevent water from seeping through the roof deck and into your home.
Installing the underlayment

The underlayment is an important part of the roofing system, and it acts as a barrier between the shingles and the roof deck, preventing water from seeping through.
Here’s how to install the underlayment:
1. Roll out the underlayment: Start at the bottom of the roof and roll out the underlayment horizontally. Make sure the underlayment overlaps the drip edge.
2. Cut the underlayment: Use a utility knife to cut the underlayment to size.
3. Nail the underlayment: Nail the underlayment to the roof deck using roofing nails. Space the nails about 6 inches apart along the edges and 12 inches apart in the center of the underlayment.
Laying the starter course
The starter course is the first row of shingles installed along the roof’s eaves, and it provides a solid base for the rest of the shingles to be installed. Here’s how to lay the starter course:
1. Cut the starter shingles: Cut the starter shingles to size, leaving a 1-inch overhang at the roof’s eaves.
2. Nail the starter shingles: Nail the starter shingles to the roof deck using roofing nails spaced about 6 inches apart.
3. Install the starter shingles: Install the starter shingles along the roof’s eaves, ensuring the overhang is even.
Installing the first row of shingles

Now that the starter course is installed, it’s time to install the first row of shingles. Here’s how to install the first row of shingles:
1. Cut the first row of shingles: Cut the first row of shingles to size, leaving a 1/2-inch overhang at the roof’s eaves.
2. Nail the first row of shingles: Nail the first row of shingles to the roof deck using roofing nails spaced about 6 inches apart.
3. Install the first row of shingles: Install the first row, making sure the overhang is even, and the shingles are straight.
Continuing the shingle installation
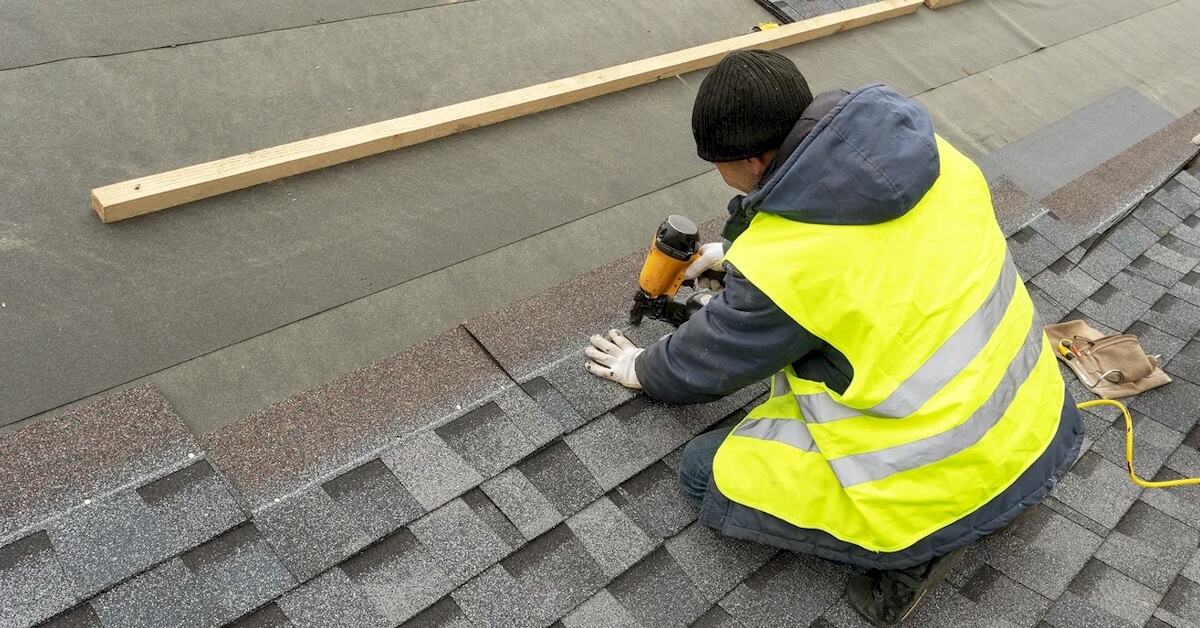
Once you have the first row of shingles installed, continue installing the shingles in rows. Here’s how to install the shingles:
1. Install the shingles: Install the shingles in rows, overlapping them according to the manufacturer’s instructions.
2. Nail the shingles: Nail the shingles to the roof deck using roofing nails spaced about 6 inches apart.
3. Cut the shingles: Cut the shingles to size as needed.
Make sure to follow the manufacturer’s instructions when installing the shingles.
Installing ridge cap shingles
The ridge cap shingles are installed along the roof’s peak, providing a finished look to the roof and helping to protect against water infiltration.
Here’s how to install the ridge cap shingles:
1. Cut the ridge cap shingles: Cut the ridge cap shingles to size, leaving a 1-inch overhang at each end.
2. Nail the ridge cap shingles: Nail the ridge cap shingles to the roof deck using roofing nails spaced about 6 inches apart.
3. Install the ridge cap shingles: Install the ridge cap shingles along the roof’s peak, ensuring the overhang is even.
Cleaning up and maintaining your new roof
Once the shingles are installed, cleaning up the debris and maintaining your new roof is important. Here’s how to clean up and maintain your new roof:
1. Clean up debris: Clean up any debris and nails from the roof and the surrounding area.
2. Inspect the roof: Inspect the roof periodically for damages or signs of wear and tear.
3. Maintain the roof: Maintain the roof by keeping it free of debris and trimming any overhanging branches.
Regular maintenance will help to extend the life of your new roof.
Conclusion
Installing roofing shingles can be daunting, but with the right tools, materials, and techniques, it can be done quickly and efficiently. It’s also important you hire a professioanl for the bigger jobs and full roof replacements.


