How To Install A Rolled Roof
If you own your own house, you want your house to look good and be protected from the elements. The roof is one of the most important aspects of your home’s exterior. If your roof is in bad shape or beyond repair, it’s time to consider a new one. Rolled roofing is an affordable and practical option for many homeowners. In this article, I will provide you with everything you need to know about installing rolled roofing like a pro.
What is Rolled Roofing?
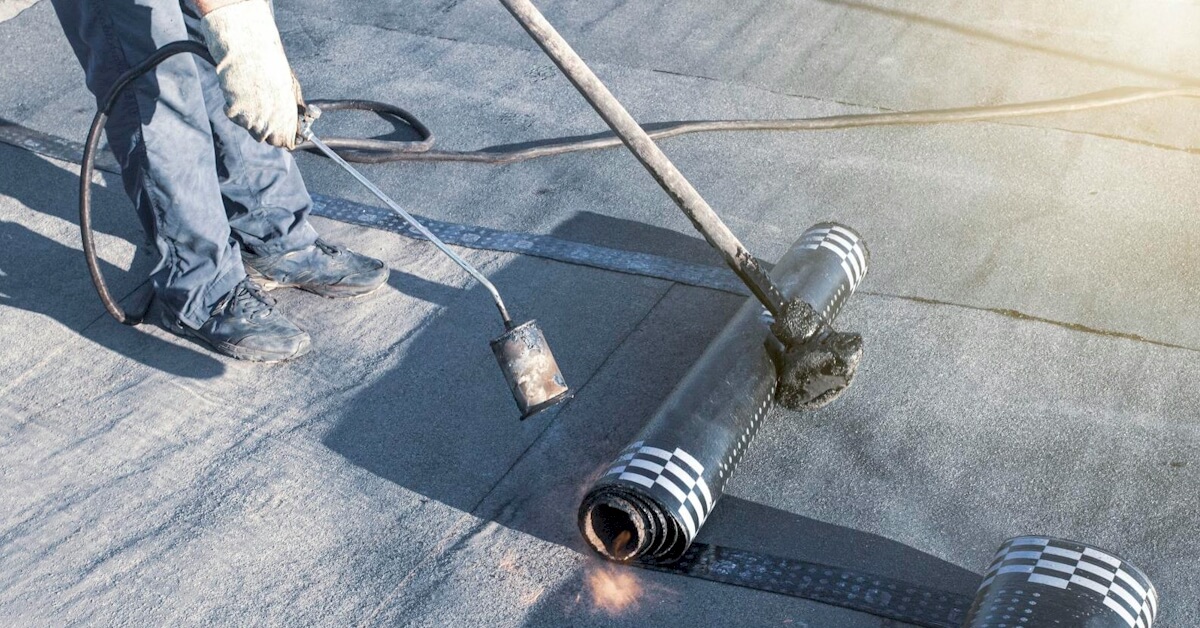
Rolled roofing is a style of roofing that is made from asphalt and is typically used on low-sloping roofs. It’s made up of a single layer of asphalt-impregnated material that is rolled onto the roof surface. Rolled roofing is easy to install and an affordable option for homeowners who want to protect their homes from the elements.
Benefits of Rolled Roofing

There are many benefits of using rolled roofing. First and foremost, rolled roofing is affordable and much cheaper than traditional roofing materials like shingles or tiles. Rolled roofing is also easy to install, saving you money on installation costs. Another benefit of rolled roofing is that it is lightweight, so you don’t have to worry about the weight of the roofing material damaging your roof structure.
Types of Rolled Roofing
There are two types of rolled roofing: smooth and mineral surfaced. Smooth rolled roofing is made from a single layer of asphalt and is the most affordable option. Mineral-surfaced rolled roofing is made from a single asphalt layer with a layer of mineral granules added on top. The granules provide extra protection against the elements and make the roofing look textured.
Tools and Materials Needed for Installing Rolled Roofing
Before installing rolled roofing, you need to ensure you have all the correct tools and roofing materials. You will need the following:
Rolled roofing
Roofing felt
Roofing adhesive
Roofing nails
Roofing cement
Utility knife
Measuring tape
Chalk line
Hammer
Roofing brush
Roofing roller
Step-by-Step Guide on How to Install Rolled Roofing

Clean the roof surface – Before installing rolled roofing, you need to make sure the roof surface is clean and dry. Remove all debris or loose material from the roof surface.
Install the roofing felt – Roll out the roofing felt onto the surface and use roofing nails to secure it. Overlap the felt by 3 to 4 inches to ensure complete coverage.
Apply roofing adhesive – Use a roofing brush to apply roofing adhesive to the roofing felt. Make sure you evenly apply the adhesive and cover the entire felt surface.
Roll out the rolled roofing – Roll out the rolled roofing onto the roof surface and use a chalk line to make a straight line for the first row. Make sure the roofing is aligned with the chalk line.
Nail down the first row – Use roofing nails to secure the first row of rolled roofing in place. Nail the roofing every 6 inches along the edge and every 12 inches in the field.
Apply roofing cement – Use a roofing brush to apply roofing cement to the edges of the rolled roofing. This will seal the edges and prevent water from seeping in.
Install the second row – Roll out the second row of rolled roofing and overlap it with the first row by 3 to 4 inches. Nail down the second row in the same manner as the first row.
Repeat the process – Continue to roll out and nail down the rolled roofing until you reach the end of the roof surface.
Tips for a Successful Installation
Make sure the roof is clean and dry before installing rolled roofing.
Use roofing adhesive to ensure the roofing stays in place.
Overlap the rolled roofing by 3 to 4 inches to ensure complete coverage.
Nail down the roofing every 6 inches along the edge and every 12 inches in the field.
Apply roofing cement to all edges of the rolled roofing to prevent water from seeping in.
Common Mistakes to Avoid When Installing Rolled Roofing
Not cleaning the roof surface before installation.
Not using roofing adhesive to secure the roofing in place.
Overlapping the rolled roofing too much or too little.
Using too few nails to secure the roofing in place.
Not applying roofing cement to the edges of the rolled roofing.
Maintenance and Repair of Rolled Roofing
Rolled roofing requires very little maintenance. If you notice any damage to the roofing, you should repair it right away. To repair rolled roofing, follow these steps:
Clean the damaged area – Remove any debris or loose material from the damaged area.
Apply roofing cement – Use a roofing brush to apply roofing cement to the damaged area. Make sure you apply the cement evenly and cover the entire damaged area.
Patch the damaged area – Cut a piece of rolled roofing to fit the damaged area and press it firmly into the roofing cement.
Apply more roofing cement – Use the roofing brush to apply more roofing cement to the edges of the patch. This will help to seal the patch and prevent water from seeping in.
Conclusion
Installing rolled roofing is a great way to protect your home and save money on roofing costs. You can install rolled roofing like a pro with the right tools, materials, and knowledge. Follow the simple steps outlined in this article, and you’ll have a new roof in no time. Remember to take care of your roof and make any necessary repairs to ensure it lasts many years.


